We all know that effective web pages have to look great, and images play a huge role in that. Fortunately, it’s never been easier to snap a crystal clear photo and blast it out to the internet.
However, we also know that images play a big role in degrading performance, and those perfect pics can cost you.
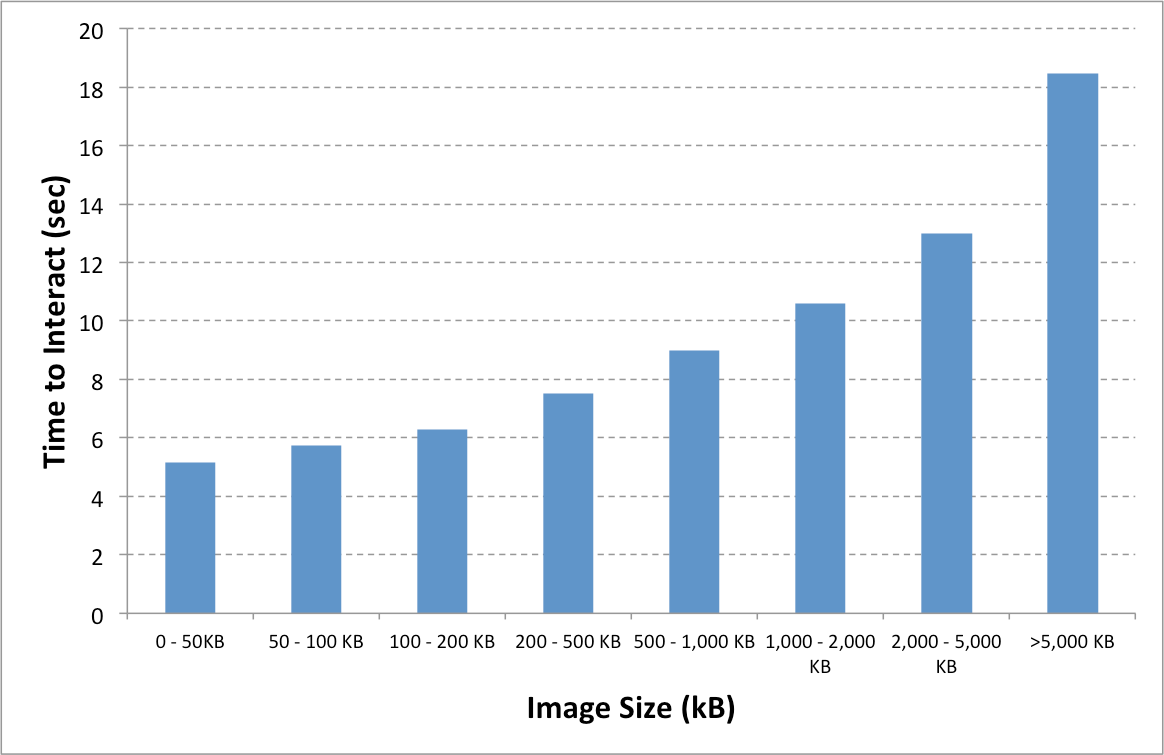
Below we see just how quickly load time can be affected by image size.

This is why it’s a good idea, early on, to plan how you want to use images on your site and what the ideal dimensions should be.
While it’s true you might need a hefty picture for that fancy full-screen background effect, more often than not, many sites load huge images that only display in small pixel windows. Resizing those images to fit the intended display area can save a ton of weight and this is where we let Sitefinity do some heavy lifting.
How it works
Each time you upload an image, Sitefinity can automatically generate several versions with different, pre-determined sizes. These additional sizes are then available for you to drop into pages or work into your templates.
For example, let’s say we have a 2000x1300 px image weighing in around 500kb, and have determined for our news content, that we need:
150x150 px news list thumbnail
300x300 px featured article thumbnail
600x300 px full article header image
All we have to do is hit upload and Sitefinity goes to work scaling, cropping and saving a separate file for each dimension.

Just like that, our news list can now display a properly sized thumbnail at a mere 5kb rather than the original 2000 px behemoth, saving us bandwidth, load time and user frustration.
How to get started
1. Get Organized
We recommend you have a plan to organize your images into specific folders or libraries. This will make the automated process more efficient, but will also help you find what you need later on.
2.Set your Sizes
This is where you tell Sitefinity what sizes to create when you upload an image. Ideally, you will determine this beforehand, but you can always add new sizes later. Read this step by step tutorial to get set up.
3. Upload Images
Now that Sitefinity knows what you need, you can start uploading. As long as you upload your images to the proper libraries, Sitefinity will do the rest. making a potentially daunting task a breeze for even the most casual content editors.
If you aren’t already doing it, it may be time to give your images some love, trim the fat and maybe even increase your site’s performance. If you are making the most of your media - keep it up and look for more ways to improve and never take internet speeds for granted.
